Wednesday, December 28, 2011

New Year's Eve Smoked Rib Roast


Are you hosting a New Year's Eve gathering?  Even if you're gathering is just you and your family, this rib roast is the perfect main course.  What's better than enjoying a savory cut of prime rib with your friends and family?  This recipe is extremely easy and it's very hard to mess up.  Rib roasts boast a generous amount of fat which makes it a perfect candidate for slow smoking, indirect grilling or roasting.  I prefer to smoke the roast, this will give the prime rib a slightly smokey flavor on the crust, it also frees up the oven for side dishes.  You'll be the most popular person at the party when you walk inside from the grill, with a delicious rib roast in hand!  I've included a recipe for a creamy horseradish sauce that you can serve with the prime rib. 

Rib Roast Ingredients
Salt
Fresh Cracked Pepper (from a pepper mill)
Standing Rib Roast - the size of the rib roast depends on how many people you need to feed.  A 2 bone, roast should feed 4 to 5 people.  If you have a large party, go for a full 7 bone roast.  Generally, it is 1 to 1 1/4 pounds (uncooked) per serving.  If the roast is too big for your grill or smoker, you can cut it in half.
Oak Wood Chunks or Chips
Butchers String

Directions
Take the rib roast out of the refrigerator and let stand for about 30 minutes.  Meanwhile, set up the grill or smoker for indirect grilling.  You want to have the temperature hold steady at 350 for the duration of the cook. 
The roast will need to be tied to prevent the meat from separating from the bones.  To do this, place the roast bone side down and place butchers string parallel to each rib.  Then use your favorite knot to hold it in place.  And you thought you would never use those knots you learned in Scouts!  If you ask your butcher nicely, they should be able to tie the roast for you. 

Now season the roast on all sides generously with salt and fresh cracked pepper.  You want to have large pepper chunks so adjust your pepper mill accordingly.  If you have a remote probe thermometer, place it in the roast now.  It should be placed in the middle of the roast, between two of the ribs. 

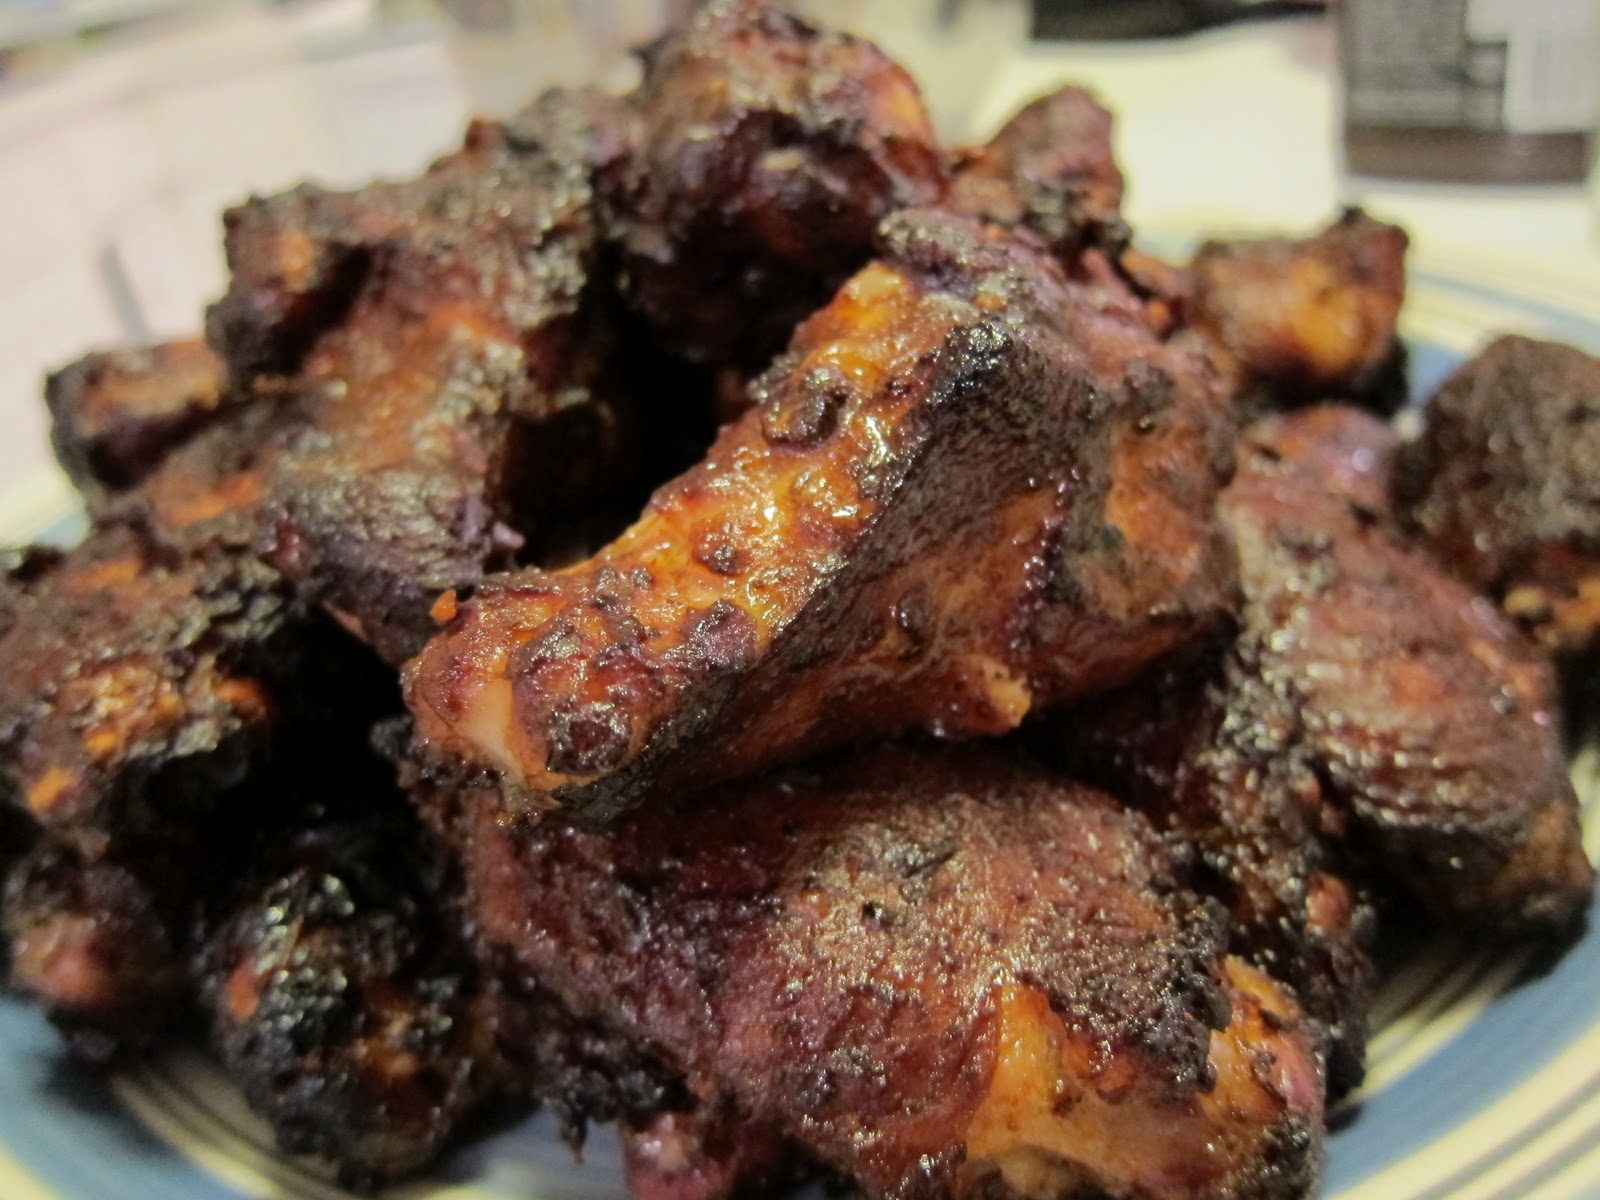
When the grill is preheated, toss your wood chunks or chips in the smoker and then place the roast, bone side down on the cooking grate.  Cover the grill and cook until an instant read thermometer reads 130 degrees.  The general rule of thumb is 15 minutes per pound but you really need to use a thermometer.  Remove the roast from the smoker and tent with aluminum foil.  Allow the roast to rest for 20 to 30 minutes before carving.  You might have to physically fight your gusts from getting to that roast but protect it with your life!  If it's carved too soon, the juices will spill all over and will be wasted.  Resting the roast, allows the juices to settle and it also allows the temperature of the meat to rise to a perfect 135 degrees (medium rare). 

Served with plank roasted veggies and crab casserole
Before carving the roast, you will need to remove the bones.  To do this, roll the roast so that the ribs are pointing straight up in the air, then take a knife and cut downward, close to the bones until the ribs are separated.  They should come off very easily.  Do not throw away the bones!!  Those are treasures that contain some of the juiciest, tender, and smokey meat on the entire roast!  Save those for your favorite guests or for yourself, after all, you do deserve a treat after all that slaving away on the grill!  Now, carve the roast into 1/4 to 1/2 inch pieces and serve with the horseradish cream sauce.  If you have guests that do not like medium rare meat, give them the end pieces of the roast.  They will be a little more done then inside of the roast.  If that is still do rare for them, calmly collect yourself, don't kick them out of your house and finish their piece with a quick sear on non-stick skillet. 

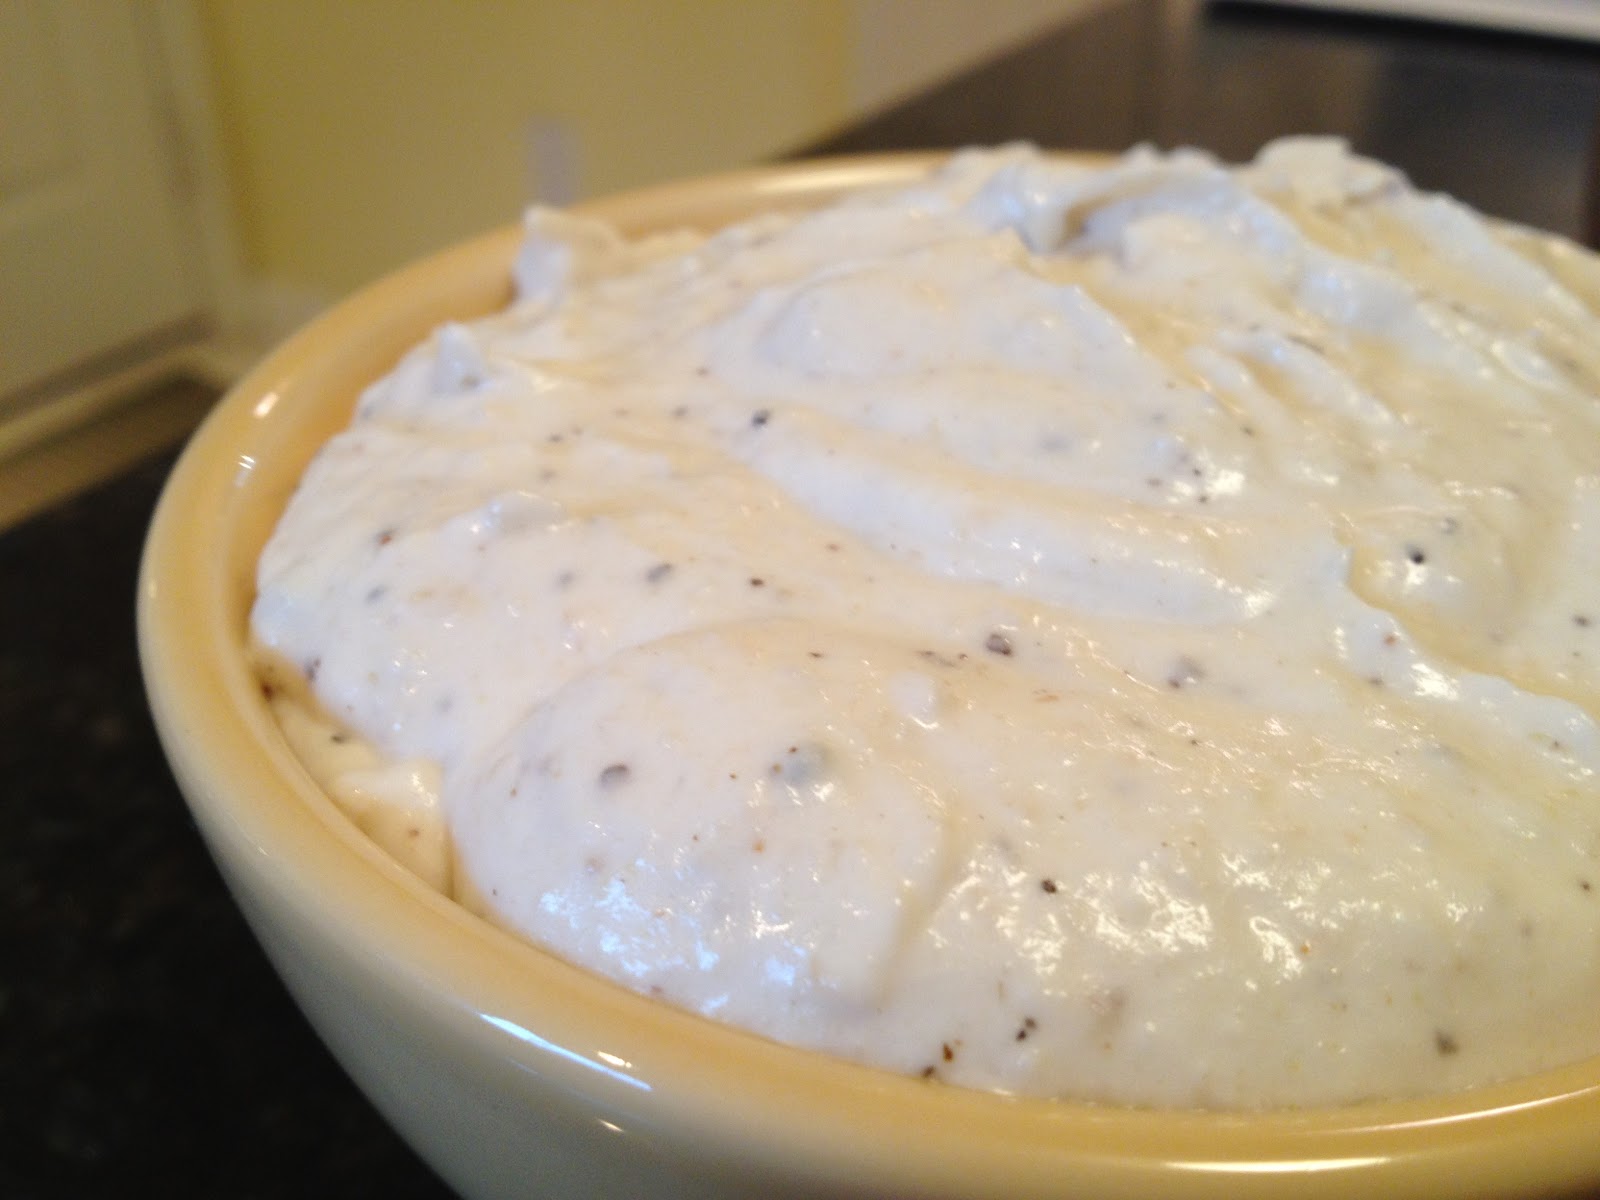
Horseradish Cream Sauce

Ingredients
1/2 cup heavy cream
1/2 cup prepared horseradish (I usually get one small jar of hot and one small jar of mild and mix them)
1 teaspoon of salt
Fresh Pepper from a mill

Directions
Place the heavy cream in a large mixing bowl and beat with a whisk until thickened.  Fold in the horseradish, salt and a few grindings of fresh pepper.  Now refrigerate and serve with the prime rib.  It also make a great sandwich condiment for roast beef sandwiches or left over prime rib sandwiches.  Yum! 

Monday, June 27, 2011

Marinated Grilled Chicken with Roasted Red Peppers, Peas, and Pesto Tortellini

When I was visiting my old college roommate in Pittsburgh last month, he prepared a version of this dish for his community pre-marathon pasta party.  When the dish was placed on the table, it looked like the knife fight scene from West Side Story!  Needless to say, it was a huge hit!

When I got home from Pittsburgh, I decided that this would be a great family meal to try.  Our kids love, chicken, tortellini, and pesto so it seemed like a no brainer.  My friend used Orecchiette instead of tortellini so feel free to improvise.  If you're cooking this on a weeknight, you can use a good store bought pesto, just be sure to look at the ingredients.  You want to use a pesto that includes extra virgin olive oil as a main ingredient.  Most of the store bought incarnations of pesto use canola oil.  If it's summertime and you have fresh basil in your garden just begging to be used, I would highly recommend this homemade pesto sauce, it's easy and will make a huge difference.  Also, you can marinate the chicken in whatever kind of "Italian" marinade you would like if you're short on time.  I often use Newman's Own, "Family Recipe Italian Dressing" with great results, but I've included a recipe for a dressing that is perfect for marinating chicken (and on salads).

For the marinade:
1/2 cup extra virgin olive oil
1/2 cup balsamic vinegar
2 cloves minced garlic
1 tbls honey
1 pinch salt
ground black pepper to taste

Wisk all of the ingredients in a non-reactive bowl.  Correct to your liking with salt, pepper, and honey if needed.  

Ingredients:
Pesto
3 Chicken breast halves
1 serving of marinade(listed above), or one bottle of "store bought"
3 Red Bell Peppers
1 Cup of Frozen Green Peas
5 cups of frozen or fresh tortellini
1/4 cup Grated Parmesan

Place the chicken in the marinade and let sit in the refrigerator for 30 minutes or up to 2 hours.  Preheat the grill.  If you are using a gas grill remove half of the grill grates.If using a charcoal grill, do not place the grate over the coals yet.  
When the grill is preheated, place the red peppers directly over the coals or the gas burners.  Rotate the peppers until they skin is blackened on all sides.  Remove the peppers and place them in a large bowl and cover with aluminum foil.
Place the grill grates back on the grill.  Cook the tortellini according to the directions on the package.  Remove the chicken from the marinade and place on the grill.  Cook for around 5 minutes per side or until cooked through.  Remove the chicken from the grill and let rest.  Microwave the peas according to the directions on the package.  Meanwhile, take a knife and scrape the blackened skin off of the red peppers.  Then chop the peppers into 1 inch cubes.  Toss the tortellini, pesto, roasted red pepper, and peas together.  Sprinkle with fresh grated Parmesan.  Slice the grilled chicken, place on top of the pasta and serve!  This dish should be served family style, preferably alfresco!

Pesto Time!!!

 Are you looking for something to do with all that basil in your garden?  Pesto is the perfect solution!  I use pesto for pizza sauce, pasta sauce, on chicken, you can pretty much put pesto on anything and it tastes great!  This pesto sauce also freezes well. 

Ingredients:
2 cups of fresh basil leaves
1/2 cup extra virgin olive oil
2 garlic cloves, chopped
1 generous pinch of salt

3 tbls pine nuts
1/2 cup grated parmingiano-reggiano cheese
2 tbls grated romano cheese
3 tbls softened butter


Place the first 5 ingredients in a food processor or blender and process into a smooth paste.

Transfer the contents of the food processor to a bowl and stir in the cheese.  Once the cheese has been evenly distributed in the sauce, stir in the softened butter and mix well.  If you are using the pesto as a pasta sauce, add a tablespoon of the water that the pasta was cooked in to the pesto sauce when tossing the pasta with the sauce.  This will help the pesto coat the pasta.

Thursday, May 19, 2011

Grilled Chipotle Lime Fish Tacos With Napa Slaw


Last March, Christy and I traveled to California to celebrate our 10th anniversary.  Our goal on this trip was to live in the moment and experience the West Coast in a organic, free flowing way.  For those of you that really know me, you know that I am a planner, and yes, going into this trip, I had a definite itinerary but I intentionally left wiggle room in case we got lost, or we found ourselves somewhere not on the map.  Thank God, we did and we had a wonderful time.  One of the hidden gems we found was a little Taqueria that was next to a BBQ place that was featured on Diners Drive-Inns and Dives (one of my favorite shows).  This place was directly on the Pacific Coast Highway about 2 miles away from a trail we were going to hike.  We were looking forward to some BBQ but the line was out of the door so we settled for the taqueria.  It turns out that we made a great choice as we enjoyed some of the best fish tacos we had ever had!  My inspiration for this dish was that Taqueria and the chipotle fish tacos they served up!

 Ingredients:
Chipotle Sauce
1 small can of chipotle peppers in adobo sauce
1 thick slice of onion
2 cloves of garlic
1 tsp of oregano
2 cloves of garlic, peeled
1 tbs Olive Oil
1/2 tsp Old Bay

Take the slice of onion and place it in a non-stick pan over medium heat with one tsp of Olive oil.  Let the onion cook until well browned on one side.  Flip the onion over.  Once the onion is well browned and almost cooked through, remove it from the heat and place it in a blender or food processor.  Add 5 chipotle peppers and all of the adobo sauce from the pepper can.  Add the remaining ingredients and blend until smooth. 

Slaw
5 tbs Olive Oil
5 tbs Rice Wine Vinager
1 tsp crushed red pepper flakes
1 tbs Honey
1 tsp salt
1 small head of napa cabbage, thinly shredded
1 cup of Julienned carrots
1/2 cup of shaved onions

Combine the first 5 ingredients together in a non-reactive bowl, wisk well and correct for salt.  The sauce should be sweet, spicy and just a little tart.  In a large bowl, mix the last 3 ingredients together.  Mix in the dressing and refrigerate until ready to serve.

Fish
4 Talipia fillets
1 Tbls Olive Oil
1 tsp Old Bay
8 soft flour taco shells

Preheat the grill to medium high.  Cut each fish fillet in half horizontally.  Coat the fish fillets with the olive oil and Old Bay.  Then coat the fish with the chipotle sauce made earlier (reserve the left over chipotle sauce for later).  Place the fish on the grill.  Cook for 4 minutes on one side and 3 minutes on the reverse side or until the fish flakes easily with a fork. While the fish is cooking, you can warm up the taco shells on the grill, reserving them in aluminum foil.

To build the perfect fish taco, take some chipotle sauce and place it on the taco shell.  Then place a piece of fish on the taco shell.  Finally, finish it off by topping it with some of the Napa Slaw.  Then take huge bite and enjoy!  The fresh fish combined with the sweet/spicy/tartness of the slaw goes perfectly together!  If I close my eyes, I can almost smell the Pacific Ocean!


Saturday, May 7, 2011

What's Andy Growing? - Garden update

I have always loved the allure of gardening.  In the house I grew up in, we had a pretty large garden and I remember helping to pick the veggies.  I have tried the pass that experience on to my kids.  My daughter absolutely loves gardening and will help out willingly in any task.   My son, not so much, but he likes eating the veggies. 

In the past, I have planted a traditional garden, in the soil, with tons of weeds.  For the past few years I have always wanted to build a raised garden to combat the weeds and the critters.  They look so nice and they are easier to maintain.  I've had a design in my head for a few years but was never able to find the time to build it.

This year, I finally decided to bite the bullet and build my raised garden!  I found a plan online for the construction of the containers that seemed easy and cheap.  I used a plan from ana-white.com that I modified.  She has the joints on the outside, I moved them to the inside so the boxes look more seamless.  The main idea of her concept is to use cedar fence posts.  Cedar is an untreated wood that is perfect for growing vegies.  The problem is that Cedar boards are very expensive.  Ana's solution is to use cedar fence posts, trimming off the dog-eared portion of the fence posts.  I was able to find the fence posts at Home Depot for around 2 dollars per board.  Much cheaper than buying cedar boards or even pine boards!  On average, it cost me 12 bucks per container.  It actually cost me more to fill the containers with dirt than to build them!
Any way, I had a great time making them and I spent some quality time with my daughter!  I will try to post updates whenever we finish a new section of the garden.  When it's finished, it will be enclosed on all sides with a pebble walk way that winds it's way though the garden.  So far I've got the main section built, tomatoes planted, and one corner built.  Hopefully I'll have some plants in those tomorrow.  In a few months, I should be posting some new recipes featuring the veggies from our garden.


Check out my tomatoes!
A plastic lizard I found that will guard my Tomatoes.

Thursday, May 5, 2011

Grilled Salmon with Roasted Tomatillo Salsa

Feliz de Cinco de Mayo!  To celebrate Cinco de Mayo this year, I decided to forgo the cheese, beef and tortillas.  I wanted to capture the flavors of Mexico and combine them with fresh, light ingredients.  One of my favorite chefs is Rich Bayless and one of my favorite things in the world is grilled fish.  Bayless' roasted tomatillo salsa was the inspiration for this dish.  In my opinion, this salsa is the perfect topping for grilled salmon.  The spiciness of the salsa pairs perfectly with with richness of the fish.  To plate the dish, I sliced a fresh avocado, placed the salmon on the avocado and then topped the salmon with tomatillo salsa and some fresh cilantro.  The entire family loved the dish (I left the salsa off for the kids)!

Fresh Tomatillos!
Ingredients:
4 Medium fresh tomatillos, husked and cut in half
2 large garlic cloves
2 Serrano chillis or 1 jalapeno stemmed and coarsly chopped - if you want the salsa less spicy, seed the chillis. I usually seed one chilli
1 thick slice of white onion
1/3 cup of coarsely chopped fresh cilantro
1/2 lime
Salt
Pepper
4 Salmon fillets (thick cut with skin on)
1 ripe avacado

Directions:
Preheat a nonstick skillet over medium high heat.  Place the tomatillos and the garlic cut side down in the pan.  Cook for 3 or 4 minutes, turn and cook the other side for another 3 minutes or until the tomatillos are soft and cooked through.  Remove the tomatillos and garlic from the pan and allow to cool.  Add the slice of onion to the pan and cook until well browned on both sides and almost cooked through.  When the tomatillos have cooled down, place them in a blender with the garlic, water, cilantro, chillis and the juice of half of a lime.  Blend until the salsa is smooth but still coarse.  Add the onion to the blender and pulse a few times until the salsa is well mixed.  Add salt to taste and pulse a few more times.  Pour the salsa into a bowl and break out the chips!  Yes you need the salsa for the salmon but I usually can't wait, plus it's a great way to taste the salsa to make sure it's seasoned correctly.

Preheat the grill to medium high.  Sprinkle the salmon with salt and pepper.  Place the Salmon fillets skin side down on the grill.  Top the salmon with some of the salsa.  Grill for about 4 to 5 minutes and then flip the salmon over.  Grill for an additional 3 minutes.  Remove the salmon from the grill.

Slice the avocado and place on a plate.  Carefully remove the skin from the salmon.  It should come off very easily.  Top the avocado with the salmon then spoon some of the salsa onto the salmon.  Top with some fresh cilantro and serve.  Mix up a pitcher of margaritas and enjoy!


Friday, March 25, 2011

Smoked "Buff-a-que" Wings

Some things are just made to be together.  Peanut butter and jelly, wine and cheese, Ernie and Bert, and most importantly, sports and food.  Right now, there is no better time of year to watch sports and eat food.  For eons, people have been having parties that revolve around sporting events and food.  I'm certain that they even tailgated at the Colosseum in Rome (NSFW) before big battles.

One of my favorite times of year is March/April due to the NCAA basketball tournament, the Masters and the start of baseball season!   This is a recipe for perhaps the most common of sports foods, the chicken wing.  Chicken wings are arguably the most perfect "sports food" ever created.  You can completely eat them with one had, leaving the other hand for beer consumption, high fives and flipping channels.  This recipe is one that I've honed over the years.  I smoke my wings and sauce them several times with a mixture of bbq sauce and traditional wing sauce (hence the name "buff-a-que").  If you do not have a smoker you can achieve great results using the indirect method of grilling on your grill.

Ingredients:

1 "Family Pack" of chicken wings (remove the wing tips from the wings and discard.  Also remove the drumstick from the wing and cut away extra fat and skin)
1/2 cup of bbq seasoning
1/4 cup of olive oil
1 bottle of your favorite bbq sauce
1 bottle of your favorite spicy wing sauce (I use Texas Pete)
2 handfulls of wood chips, soaked in water for 30 minutes (I prefer apple wood)

Season with chicken wings with the dry bbq seasoning then coat the wings in olive oil.  I like to do this step in a 1 gallon ziplock freezer bag.  Next combine the bbq sauce, with the spicy wing sauce and set aside.  I prefer a mix of 60% spicy wing sauce to 40% BBQ sauce.  You can adjust the mix to your own taste. 

Saucy Wings
If you are using a smoker, prepare the smoker for cooking between 300 and 350 degrees.  If you have a water pan in your smoker, cover the pan with aluminum foil but do not put any water in it.  If you are using a grill, set up the grill for indirect grilling.  Place the wood chips or chunks on the grill or smoker directly over the coals.  If you are using a gas grill, place the wood chips in a smoker box or wrap them in heavy duty aluminum foil and put them over the burner. 

Place the chicken skin side down on the smoker or grill away from the flame.  Cook for about 40 minutes (60 to 90 minutes on a smoker), turning the wings about half way through cooking.  Start basting the wings with the sauce every 10 minutes or so during the last 20 minutes of cooking.  When the wings are cooked through, remove from the grill and serve with blue cheese dressing for dipping.  If you like your wings extra saucy, pour the remaining bbq sauce over the wings after they have been removed from the grill.  Turn on the game, invite your friends over, get out lots of paper towels and enjoy!

Sunday, March 6, 2011

Mussell and Shrimp Paella

A couple of years ago, I was on the receiving end of a wonderful Christmas present, an authentic Spanish Paella pan! I've always been fond of Paella. My Dad made paella every summer at the beach so eating it, always triggers great memories.

I love the versatility and range of Paella. There are so many variations of Paella that you can seemingly eat it forever and not have the same dish twice. You can always add any ingredients to the dish to make it your own. One of the things that I have learned about Paella, is that the dish is all about the rice. That should be the focus of the dish and the ingredients should complement the rice not overtake it.

Ever since I received my own paella pan, I've been experimenting with different kinds of paella.  It's a very fun dish to make.  There is lots of sauteing and it smells amazing as you are cooking.  It's a great dish for entertaining, just be sure to do your prep work before the company comes over.  You don't want to be stuck in the kitchen chopping while everyone else is having fun! 

This recipe is an all seafood paella.  Mussels are one of my favorite things in the world!  I remember going to Cape Cod as a kid and picking them right off of the rocks by the canal that we took walks by.  Use fresh mussels not frozen (yuck) and if you can find it, use Bomba Rice imported from Spain.  If you can't find it, arborio rice (short grain) works well.  This recipe really highlights the flavor of the mussels and it blends perfectly with the sweetness of the rice.

One day, I will make it to Spain and eat my way across the country! Until then I will keep on trying out recipes from Penelope Casas. I have two cook books from her that I've had great luck with. This dish was based of a dish from her book Paella! Spectacular Dishes from Spain.  Now, mix up some sangria, and cook up this delicious paella.

Ingredients:

2 pounds of mussels in their shells washed and cleaned of their beards
1/2 cup of dry white wine
2 1/2 cups of clam juice or seafood stock
Check out my mussells!
1/3 teaspoon of crumbled saffron threads
1 hard boiled egg, peeled and chopped
1/4 cup of olive oil
1/2 pound of shrimp, peeled and deveined
2 cloves of garlic, chopped
1 Spanish onion chopped
1 green bell pepper chopped
1 tablespoons of chopped fresh rosemary
1/2 teaspoon of salt
1/4 teaspoon of smoked Spanish hot smoked paprika (if you can't find it regular paprika will do)
1 1/2 of bomba rice or arborio short grain rice
around 14 Sugar Snap Peas
1 small can of pimento strips

Directions:
Reserve around 14 mussels and place aside.  Place the wine into a large skillet with a tight fitting lid add the remaining mussels, cover and cook over high heat for about 5 minutes or until most of the mussels have opened.  Discard all of the mussels that did not open.  Reserve all of the fluid that the mussels cooked in and strain into a large liquid measuring cup.  Top off the reserved broth with enough clam juice to make 4 cups of liquid.  Return the broth mixture to the pan, place over medium low heat and add the saffron.  Keep the liquid mixture warm but do not bring it to a boil.

Preheat the oven to 400 degrees.
Remove the cooked mussels from the shells and chop the mussels coarsely.  In a large paella pan or skillet, add the olive oil and place over medium high heat.  Add the shrimp and cook for about one minute, stirring constantly.  Using a slotted spoon, remove the shrimp from the pan.  Add the bell pepper, garlic, onion, rosemary, salt.  Lower the pan to medium heat and cook for about 4 minutes.

Stir in the paprika and rice and mix until the rice is well coated with oil.  Add the broth to the pan and bring to a boil.  Boil the mixture for about 2 minutes and then add the chopped egg and shrimp.  Continue to cook over medium heat until the mixture is not soupy but so there is enough liquid left to cook the rice.  If your burner is not large enough to cover the entire bottom of the pan, rotate the pan occasionally while cooking.


Top the rice mixture with the uncooked mussels, peas and sliced pimentos and place in the oven.  Cook for 10 to 15 minutes or until the rice is cooked through. 

Remove the pan from the oven and place on a burner over high heat rotating the pan constantly for 1 to 3 minutes.  This will crisp the bottom layer of rice and form the soccarat, which is the most coveted part of the paella in Spain.  Be careful not to burn the rice.  You want the rice to be a nice golden brown.  This step is optional.  A nice way to serve this dish is family style, right out of the paella pan.

Invite over your friends, mix up a pitcher of sangria and enjoy!

Monday, February 21, 2011

Spaghetti Squash Al Forno


One of my running buddies has been asking me to post a vegetarian dish.  I try to weave all veggie dishes into our meal rotation occasionally but I don't have a large arsenal of them.  I was watching one of my favorite shows, Diners, Drive-Ins and Dives the other day and featured on the show was Earls Drive Inn, located in, Chaffee, New York.  The head chef at Earls, cooked a vegetarian dish that I had to try.  It's spaghetti squash and any kind of vegetable combo you can think of, mixed with marinara sauce, piled back into the shell of the spaghetti squash, topped with fresh mozzarella and baked in the oven.  The result looked amazing!  The episode I saw this cooked on was called "Twists and Traditions".  You can experiment with the veggies included in this dish, be creative!  Dena, this ones for you!

Ingredients:

1 spaghetti squash
2 cups of uncooked fresh broccoli,  chopped into bite size pieces
1 cup of mushrooms
1 cup of onion, chopped
1/2 of a carrot, peeled and chopped
1 half of a red bell pepper, seeded and chopped
1/2 cup of zuchinni, chopped
1/2 cup of egg plant diced
1/2 cup of yellow squash, chopped
1/2 cup of fresh asparagus, chopped into bite size pieces
3 cloves of minced garlic
2 tablespoons of olive oil
1/4 cup of wine
fresh mozzarella cheese
1 jar of marinara sauce.  

Cut the spaghetti squash in half length-wise.  Bring a large pot of water to a boil.  Place the spaghetti squash in the boiling water and boil for 15 minutes or until tender.  Remove the squash from the water and remove the squash from the shell with a fork, reserving the empty squash shells and the shredded squash for later.  The squash should resemble spaghetti, hence the name spaghetti squash.

In a large pan, heat the olive oil over medium heat.  Heat the marinara sauce in a separate pan.  Add the onion to the olive oil and cook for 5 minutes.  Add the garlic, broccoli, asparagus, mushrooms, carrot, bell pepper, yellow squash, zucchini and saute for 10 minutes.  Add the wine, and cover.  Cook until the vegetables are almost cooked through, about 10 more minutes.  You still want them to have some bite to them.  Season with salt and pepper.  Add the spaghetti squash and half of the marinara sauce.  Spoon the mixture back into the reserved spaghetti squash shells.  Bake for 30 minutes or until the cheese is melted and bubbly. Top with the remaining marinara sauce and enjoy!

Tuesday, February 15, 2011

Rotisserie Chicken Chili


One of my running buddies, Thad McLaurin, who I credit for getting me connected with my running group, writes a blog called RunnerDudesBlog.  It's a fantastic blog about running, fitness, nutrition and exercise.  He has interviewed pillars of the running community, Olympic athletes, authors, and me.  I'm not sure how I finagled my way onto his blog but I'm honored to provide a recipe for RunnerDude and his readers!  If you love running, want to take up running, or just want a great recipe for Rotisserie Chicken Chili, check out his blog. 
RunnerDude!

Thad also operates a very successful fitness company in Greensboro, NC called Runner Dude's Fitness.  If your in the market for some personal training, running advice or nutrition consulting (you might need it if you read my blog), give him a call. 

Now go make some chili!  Thanks RunnerDude!

Thursday, February 3, 2011

Real Maryland Crab Cakes!

One topic that seems to come up repeatedly at the Manry family dinner table (the grown up table) is what our "death meal" would be.  In other words, if you were going to die tomorrow, what would your last meal be.  Yes, it's a dark topic, but it's always a fun discussion.  My wife would definitely choose crab cakes, and I think I might be right there with her.  I'm not talking about the horrible "Maryland style" crab cakes that every restaurant claims to have here in NC, but real Maryland crab cakes!  Most of the crab cakes that you get outside of Maryland have more filler than crab and they are deep fried.  They are basically fried bread with a little bit of stringy crab mixed in. 

I admit, Maryland natives are a very proud people. We tend to think very highly of our home state in all regards but especially its cuisine (and we're right).  Some of the best crab cakes in Maryland come from Faidley's located in Lexington Market in Bal'mer, (Baltimore for you non-Marylanders).  The following  recipe is an attempt to duplicate Faidley's crab cakes.  They use Jumbo Lump crab meat in their crab cakes.  This is extremely hard to find outside of coastal cities.  If you can find it, and have the money, buy it.  It makes a huge difference in the texture of crab cake.  In this recipe, I'm going to use backfin because it's readily available and it was on sale.  By the way, Faidley's uses backfin crab meat as their "filler" to bind the jumbo lump crab meat together.  I use crushed saltines.  Winner Faidley's.  If your ever in Charm City, and want a true Baltimore experience, pay a visit to Lexington Market.  Get some Faidley's crab cakes for lunch, and for dessert, get some Berger Cookies (also located in Lexington Market). 
Crabbie Patties!

Ingrediants:
1 Large Egg, lightly beaten
1/2 cup of Mayonaise
1 tablespoon of Dijon Mustard
1 tablespoon of Worcestershire sauce
1/2 teaspoon hot sauce
1 pound of Crab Meat (preferably jumbo lump)
Saltine crackers (about 20, crushed up)
Old Bay
3/4 Stick of Butter


Cooking in Butter
Combine the first 5 ingredients in a mixing bowl.  Pour the crab into a separate bowl.  Slowly add about half of the mayo/egg mixture to the crab meat.  Carefully mix together, you do not want to break up the crab meat to much, the lumpier the better.  Add about half the the crushed saltines.  Keep repeating these steps until the crab meat mixture is at a point where you can form patties out of it.  You might not need all of the Mayo/egg and Saltines.  Form the crab meat into around 8 thick patties (if you want larger crab cakes make fewer crab cakes, duh!).  Place the crab cakes on a wax paper or foil lined baking sheet.  Sprinkle the crab cakes with Old Bay and chill in the fridge for at least 1 hour. 
Do you see any filler here? 

Remove the crab cakes from the fridge and now your ready to cook!  Melt the butter in a heavy pan, preferably a iron skillet over medium heat.  Carefully, place the crab cakes in the pan and cook in batches, for about 5 to 7 miunutes per side.  Be careful when you flip the crab cakes over so that they do not break apart.  When the crab cakes are done, they should be well browned on the outside

Now, put on the O's game, pour yourself a Natty Boh and enjoy Hun!